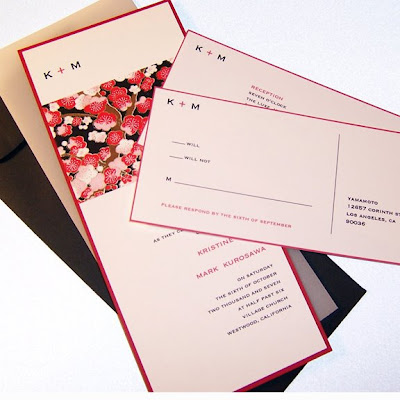
When it comes to invitations there is a bottomless well of information I could give you, but for the sake of time, I'll keep it simple.
Save the Dates...do you need them?
My opinion...No. You don't NEED anything...but there are instances when some sort of advance notice is in order:
-if a significant portion of your guest list are from out of town
-if you are having a destination wedding
-if you are planning more than one day's worth of activities
Do you need to send a physical Save the Date?
No, but they do give your guests a little taste of what you have planned for the big event. Remember we live in the age of technology, therefore you do have other options like:
-creating a free blog (blogger) or wedding website (wedding channel). these options are great because they allow you to invite your guests to share in your journey...you determine how much or how little you want to post. See this site for inspiration.
-make personal telephone calls. this gives you a chance to connect with family and friends you haven't seen in a while...it's also a good way to inform those who either don't have internet access or are not internet savvy...like some older relatives.
There you have it. If you are on a tight budget...these little notes can certainly be eliminated without making you look cheap or tacky.
Now on to the invitations...do you need them?
If you are only inviting immediate family...No.
Otherwise. Yes, you do. Perhaps there will come a day when people email their wedding invitation...I'm just not there yet, If you aren't either...here are some things you may want to keep in mind.
If you intend to make your own invitations then you may want to begin by choosing your paper.
Coverweight (also know as cardstock) is a heavy weight paper used primarily for the invitation itself or as the backing on a layered invitation. It can also be used to create your own pocket folder. If you plan to print at home you may want to do a test run to make sure that your printer can accommodate the paper you choose.
Textweight is a lighter paper similar to standard printer paper. While this wouldn't be sufficient for the invitation itself, it is perfect as the text sheet on a layered invitation. You can find it in a variety of textures like linen, iridescent and more. If you are using an inkjet printer you must use uncoated paper that can absorb the ink...if you are using a laser printer, smooth coated or uncoated paper is best. Make sure to test before investing in bulk paper and always check the return policy.
Prior to creating your own custom invitations I suggest first choosing your envelopes. In the US there are standard stationery sizes. It can be difficult to find pieces that fall outside these standard measurements.
Designing the Invitation:
There are many different ways to begin but my advice is go with what you know. Don't attempt to learn a sophisticated computer program unless you really want to. You would be surprised at what can be accomplished in Word. I am putting together a few downloadable templates to make it even easier...but until then here are a few tips.
-if you are a complete novice, it is okay to borrow ideas from elsewhere. You aren't selling your creations, it's for personal use only so don't be afraid to imitate the look of your favorite costly designs. There are many many websites out there so happy hunting.
-if you want to use color...go for it, but it is much easier to begin with light or white paper and change the text color rather than trying to print lime green on fuchsia. there are limits to what home printers can do. Printing white text on a dark background is also not likely unless you print in reverse. This refers to a process in which you print full color on white paper and leave the actual text colorless, therefore creating the illusion of white text, although really it is just the absence of color. BTW: this uses up a LOT of ink and is not really recommended for home printing.
-when choosing fonts...make sure to select something people can read. i love script fonts as much as anyone...but it can be difficult to read a whole page that has been typed completely in script, so consider doing a bit of both. you can find free fonts here.
-for wording help take a look here, here and here for some great ideas.
-i can not stress the necessity of test runs. you can never be certain that what you see on screen will translate to paper until you see it with your very own eyes.
Assembling the Invitation:
I am going to make a suggestion that I feel is perhaps the most important thing ever. If you can swing it...and I think you can. GET PROFESSIONALS TO DO YOUR CUTTING. I am an experienced cutter of paper. an expert. but after cutting down 300 pocket folders, backings, text layers, rsvp cards, and reception cards....a total of 1500 pieces. I will NEVER do that again. NEVER. I regret not heading over to my local print shop and paying 20 bucks for them to cut everything. EVERYTHING. yes, I found out later it would have cost me a whopping 20 bucks.
Please refer to yesterday's post for adhesive suggestions, and to this post and this one for even more practical info. Allow yourself plenty of time and don't be afraid to ask for help. For more Invitation DIY information check out these sites:
paper source
mountain cow
diy bride
the uncommon bride
offbeat bride
This is also a really great post.

No comments:
Post a Comment