Showing posts with label diy. Show all posts
6.16.2014
makeshift | gold labels
I'm pretty fond of labels. Do you remember when I sold these & these in my old Etsy shop? I certainly appreciate the fact that they can be both colorful and useful. That said, I never buy them...why should I when I am an expert label hoarder? But, when I saw the gold edged labels in the June Scrapbook Kit by Studio Calico I swooned just a tiny bit. Like everyone on the planet...I'm digging gold right now, so those little labels caught my eye for sure.
Only thing...I don't get the scrapbook kit, and I wasn't going to get it just for some labels and they don't sell the labels separately so what's a label lover to do? You got it...it's time to makeshift.
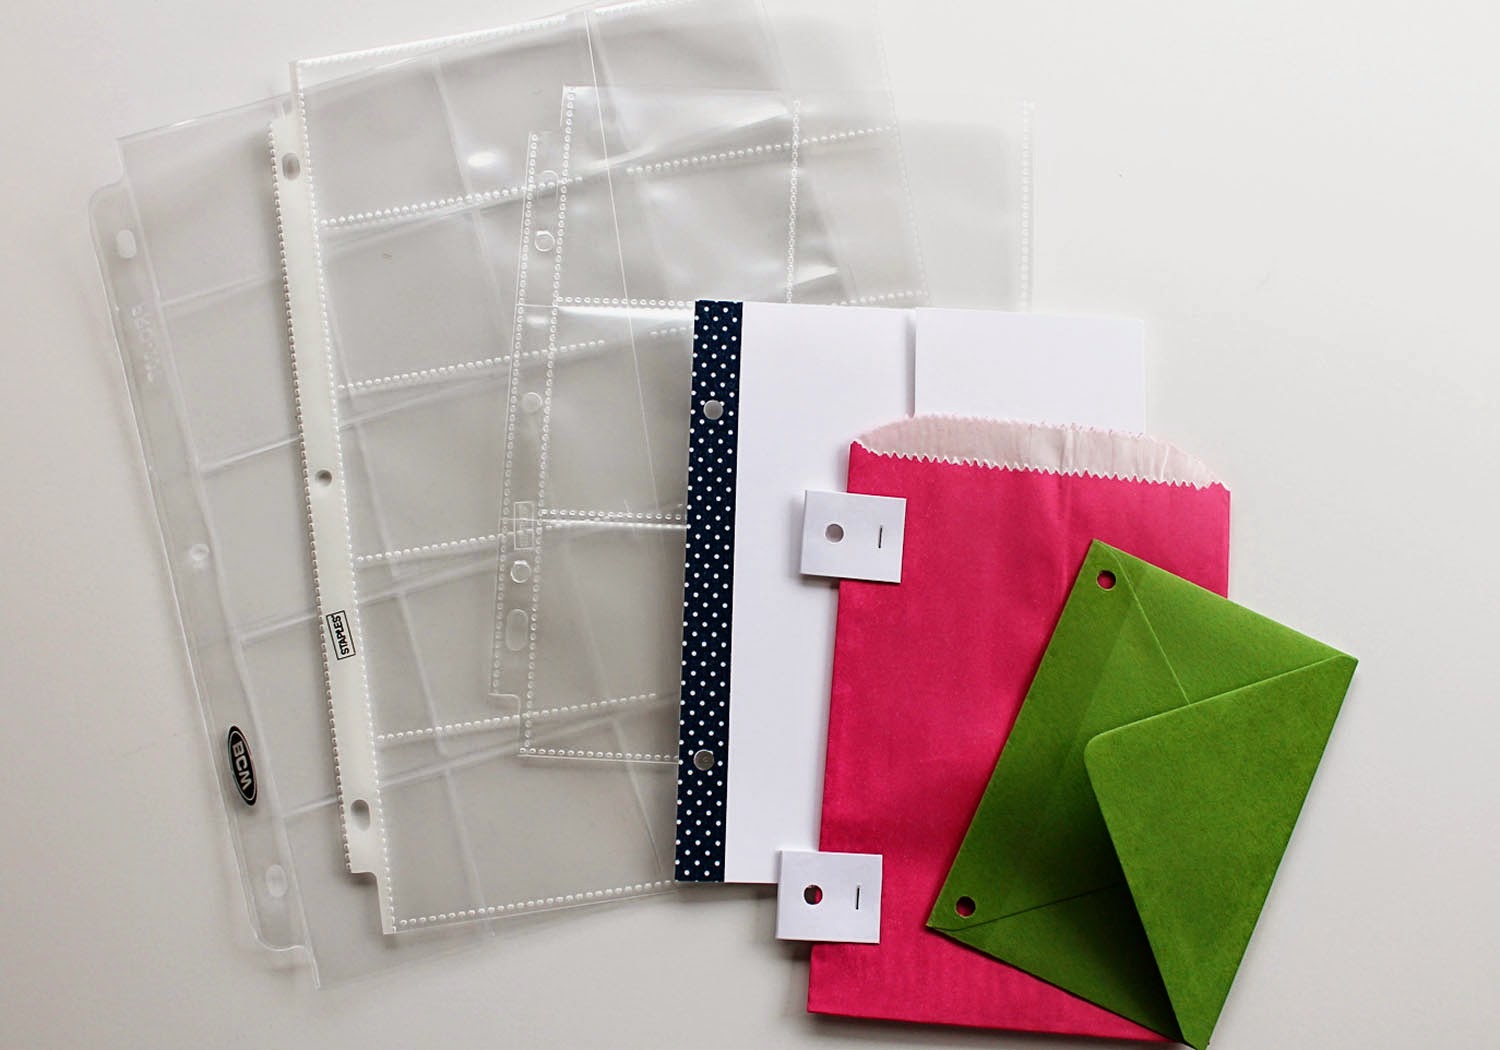
When I decide to make things, I realize that this does not always translate to cheap or quick...it really means doing something myself for the sole purpose of immediate satisfaction. It also means trying to use what I have lying around. In this case: white sticker paper, metallic gold scrapbook paper that I bought from Joann many moons ago, a cutting mechanism, I used both my Cameo and my paper trimmer, and a bit of time.
Option #1: When I used my Cameo, I created two files...one with the label outer shapes and one with the inner. I cut the outer shapes out of the gold and the inner out of the white sticker paper and then adhered one to the other. Success! If you have a machine this is the way I would go. Perhaps you might see this and think "oh my, why waste all that gold paper when all you're really using it for is a thin frame". This is true, but I think trying to add glue and affix a thin gold frame to a piece of cardstock would make my brain break so I'm wasting a bit of gold to preserve sanity.
Option #2: If you find yourself without a diecutting machine, or you don't want to dust it off, or figure out how to make inner and outer label shapes...you might find the second route more favorable. Simply trim/cut rectangles out of the white sticker paper...this is the inner portion of your label. The size is up to you...depends how much white space you want. Then, using your eyeballs and a 1/4" hole punch, cut the notches out of the corners. If you'd rather trimmed corners you can just clip them off with a pair of scissors. If you are a perfectionist...then create a template or measure or do what you do...although I'm not a perfectionist, I do like things nice and neat. If you don't trust your eyeballing ability then take your time on this step. Once you've got a bunch of white labels, remove the sticky back and attach to the gold using the top edge and side edge as your guide. I went for a slim 1/8" border. You can do whatever pleases you. I tried to line them all up first. I then cut them apart using my paper trimmer. A craft knife and straight edge would have yielded very accurate results, but I didn't bother. Last thing to do is cut notches out of the gold...Some of the labels I just made completely straight.
Now tell me? Did I make this seem complicated? If I did I sincerely apologize for it was quite simple really. Like I said...makeshifting isn't necessarily easy and/or cheap, but it is fun and wonderfully satisfying. Oh...and although I purchased that metallic gold paper at Joann's...It cost double what I found it for online, but with shipping...I don't know, maybe it would work out to the same. It is a perfect weight and it's not too heavy which I like. The Cameo cut through it like butter. It also has a very smooth sheen...I like gold, but not shiny gold. Also, I got that little mountain of labels using less than one sheet of both the gold and the sticker paper so there you have it.
you can find another great DIY tutorial using the EK Success label punch here
5.23.2014
my favorite | scrapbook inserts
Since switching up my scrapbook style from layouts to pockets I have occasionally needed and wanted to add a bit more. Sometimes that "more" is simply for fun, but more often than not it's for function. Choosing to do a smaller abridged version of Project Life® means less pockets over all...couple that with the fact that I do it once a month and I often find myself with more pictures than space. Sure... I do my best to edit, but really, this is my scrapbook and I want to include what I like, so inserts have become a very necessary part of my process.
Below are my favorite ways to add in more words and pictures:
Envelopes: The epitome of "simple is best." If you don't have them you can easily make one using a downloadable template or gently pulling apart a used one and tracing it. I find that envelopes are a good way to add more photos that you don't care to display. It's also great for notes. I keep a monthly notebook and sometimes I don't feel like adding in all the stuff that I've already written down so I just rip the page out of the notebook and pop it in an envelope. Voila! journaling done. *Tip: to reinforce the punched holes use packing tape...I just fold it over the bottom edge and punch.
Small Bags: These are perfect for storing bits of ephemera and such...plus I really like the pop of color they add. Not everything needs to be encased in plastic.
Accordion Folders: I started making these a long time ago when I designed invitations. Some have built in pockets while others just provide a spot to add more pictures. It's also fun to experiment with different folds and such.
Plastic Coin Protectors: Thanks to these brand new protectors by Simple Stories, I don't have to cut down the large 2x2 coin protectors anymore...these fit right in.
Plastic Business Card Protectors: I really love this one because I can use them two different ways. They can easily accommodate vertical Instax style photos or horizontal full size photos. I like doing the little faux instax ones because it leaves me with a bit of space for journaling.
Plastic Coupon Protectors: These are roughly the same size as my normal size protectors and provide six pockets for slightly larger pictures. I don't use this one as much, but I do like having them on hand.
Zipper Pouch: These are the workhorses of my book. My local office supply store typically has all kinds that easily fit (or can be made to fit) my 6x8 binder style album. I use the Martha Stewart ones or the ones sold for day planners. It is a great catch all for business cards, ticket stubs and other bits that I want to hang on to. Simple Stories now offers one made for the Snap album.
6x8 Plastic Protectors: I try to keep plenty of these on hand...partly to accomodate my full size layouts but also so that I have something that can easily be cut apart and stitched up to create an assortment of custom pocket sizes.
I find myself using only one of the above at any given time. I think that for me, adding random inserts keeps the process fresh and I like the ability to create extra space when I need it. If adding inserts are your thing, these flips by Simple Stories or these tabs by Basic Grey might come in handy or even this tab die by Studio Calico...as you may have guessed, I just make my own:)
BTW...if you use the Snap system like I do, Scrapbook.com is having a sale and there are a bunch of brand new protectors:)
Have a Great Memorial Day Weekend!!
4.28.2014
Fast & Loose
This is pretty much my card making style.
I love to make them. I love stamping and paper and embellishments and sewing...I just like them better when they take me less than 10 minutes.
Two minute cards? okay, I'll cop to a bit of hyperbole there...but you know what I mean.
In an effort to get these cards to come together quickly I always start with a bit of inspiration. I like looking for non card related images in particular. I try to avoid using other card designs as inspiration since I find myself wanting to recreate them rather than be inspired by them.
For today's card I was super inspired by the cover of this simple modern planner. Sad that it's no longer available, but it's really pretty and was easy to interpret.
Wanna see how I did it? Check this out...
Supplies:
Hero Arts Classic Messages 2x3
Acrylic Block by Tim Holtz
Jenni Bowlin Spice Tin Ink (i think this was discontinued)
Sundrifter 6x6 Paper Pad by Studio Calico
Puffy Stars and Circles Stickers by Twine & Ink (got these in the "Gertrude" add-on from SC)
Labels by me
Sorry some of these items aren't readily available. I tend to try and get as much use out of my supplies as I can. One of the reasons I love this design is that I can use such a wide range of products...sequins, enamel dots, punched paper shapes, even small stamped images. I think I'm ready to make another two minute card:)
Subscribe to:
Posts (Atom)