As we slowly approach the season of road trips and vacations I find myself sifting through my collection of postcards. I don't keep very much mail, but for some reason I always hang on to them...attaching them to my fridge or my bulletin board. Quite honestly, I almost prefer a postcard to a greeting card...I don't know why, maybe I just love imagining myself in the picture...just slightly out of frame or the idea of someone stumbling on my pack of old postcards one day. Yes, I'm a bit of a romantic and to me...postcards can be pretty wonderful.
I decided to make of few...just a pack of pretty pictures that I could give as a gift or keep for myself. The box is all important because it inspires the recipient to perhaps start a collection of their own.
Here's how I did it:
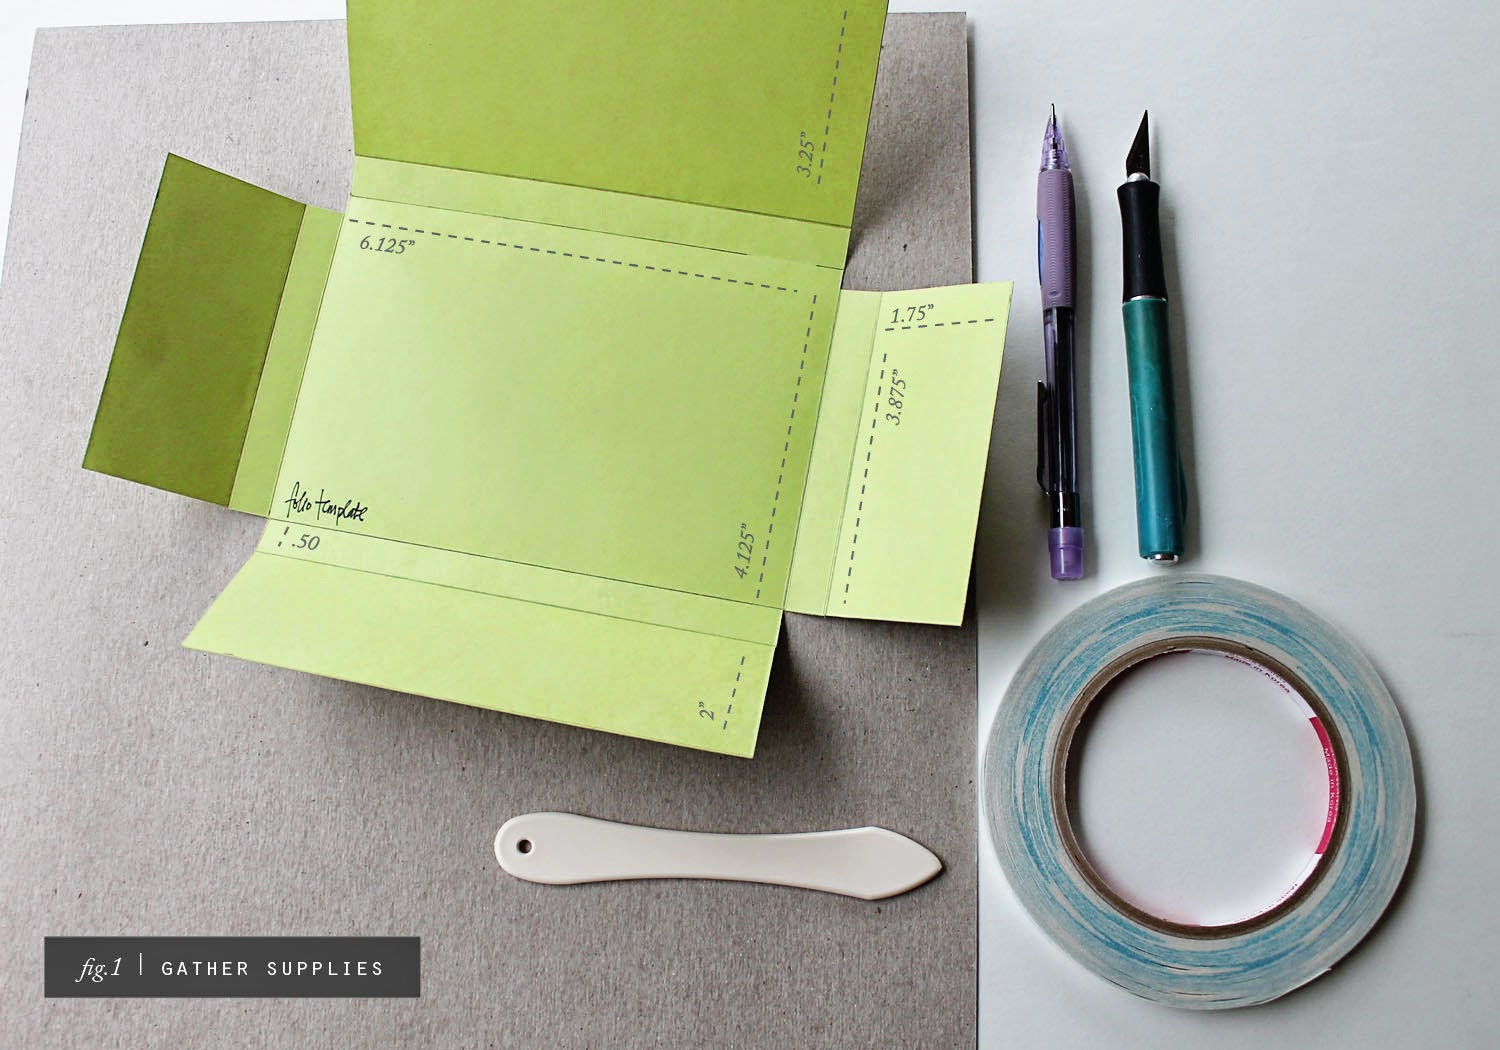
fig.1 I gathered my supplies for the box first. This included a 12x12 piece of chipboard that came in a shipment I received. A template I made, some strong
adhesive, a pencil, a craft knife with a fresh blade and a bone folder.
fig.2 Trace the template on the chipboard, cut and score. Use the picture and measurements as a guide. Round corners if you like and add tape. The box is designed to accommodate standard 4x6 cards.
fig.3 Choose the pictures you'd like to use. Include a good assortment that will work well for a variety of occasions. Don't be afraid to try fun filters...they work well for this kind of project. I prefer
Kodak photo paper with the satin finish. Add double sided adhesive to the reverse side of the photograph.
fig.4 Adhere photos to the postcard backing that you can download
here. Trim the edges if they don't match up exactly. This process is called duplexing. I use a crisp white card stock for the postcard side.
fig.5 Use a piece of black cord or elastic to keep your box closed. You can also use a small
Velcro dot. If you're giving as a gift, be sure to include a set of postcard postage and even a cute pen. Enjoy!