Showing posts with label paper. Show all posts

3.02.2015

Get Messy || no. 03


This week's journal entry is a bit of a hodge podge. Sometimes when I feel a little stuck, I pull a bit of inspiration from multiple sources instead of just one. The really great thing about the Get Messy group is that you begin to amass quite a collection of art and journal prompts. That way you can always find something to get the ideas flowing.


I describe this as part reminder, part self portrait, part getting creative with paint, and part washi tape.
They don't really seem like they go together...especially the washi, but I had fun finding ways to incorporate it without it being too whimsical. I wanted to try and maintain an ethereal quality. The background was the best and most time consuming part. Working with acrylic paint can sometimes be a challenge. It doesn't blend quite like watercolors, it doesn't have a long working time, it lends itself to layering which is definitely my favorite way to use it. Color on top of color...really working it in, just going with whatever happens. 


I added an old woodblock script stamp to emphasize the worn vintage look I was trying to create. In order to get it to fade away, I stamp it off a bit and dab away ink in random places. The trick is to get it to stamp unevenly. I also like to incorporate my own handwriting in pencil. I was trying to get it to look almost like an old love letter. The words above the photo read" "whatever i am is enough."
The photo is a picture of me, switched to black and white and printed on printer paper. The thinness of the paper almost gives it a translucent quality. I adhered it and painted over it using gel medium which is great as an adhesive, but also shows off brush strokes...which is really why I used it. The washi was added to give a bit of a modern touch...the color, the straight lines...I was really happy with how it turned out.

2.24.2015

Get Messy || no.02


Oh hello, yes this is my second post in the same day. I had these posts ready to go but had yet to take decent pictures. I seriously can't wait for warmer weather and longer days.  That said,  I am posting pictures of the journal page I made for the second set of Get Messy Art Journal prompts. Still in keeping with the Season of Love theme. I did a two page spread devoted to my one and only...YOU know who you are.


I used the word "you" as both my art and my journaling. I wanted to capture the feeling of devotion and selflessness that are components of my own personal love. The word "you" is the ultimate expression of that as opposed to the words "I" or "me." Not being terribly adept at brush script, I decided to wing it without practice. I wanted to capture something that had fluidity and wasn't absolutely clear which is why I allowed the edges to bleed. I wanted the letters to appear as shapes with movement rather than a clear word. I kept the background clean creating minimal texture using paint. The words obviously are quite simple and get straight to the point. I love the idea of destiny and it was to that which I was referring.

Get Messy || no.01

As a member of the new Get Messy Art Journal group, I have been having a great time being a part of such a creative and prolific community. It has taken me a while to find my rhythm after moving, the holidays and being sick for a month, but easing into it has been good for me. You can still register for the group here if you are so inclined.

The theme this season is Love and the prompts have been superb. I love having a jumping off point and something to ponder while I come up with an idea. Like most of my pages, I often start with words...either my own or a fitting quote, lyric or excerpt from a beloved book. I then create imagery that I feel supports the word. This is where I really get to challenge myself.

My first entry is a single page which I do create from time to time. I used my handmade journal for this one. The words read..."You have to keep breaking your heart until it opens." This is a quote by Rumi that I came across on Pinterest. I believe it to be true. Heartbreak is an intrinsic part of love and can help one open up to something deeper and infinitely sweeter.  I used small bits of paper in a similar color palette to create layers. I wanted the papers to scatter from a single point mimicking the look of something shattered or broken.


Interestingly enough, just a few days ago I was scrolling through my Instagram feed and came across this quote by bonnietsang. I though it fit the idea of what I had felt when making this page so well. I love when that happens.

"Turns out, the heart must be broken into a million pieces in order to reveal your inner light. In that light, you'll see your true self resting and at peace-she has no judgement she is accepting and she is full of love."

1.19.2015

this is happening


Yup. It's been over a month since I last blogged.  Let's call it a winter break shall we:) During my respite, I moved to a different city as noted in my last post, I drove through half the country...the upper western half and I got a month long flu. I know, I know...that's all so 2014. I am now firmly ensconced in my lovely Chicago neighborhood. I've already slipped while walking the dog...definitely a rite of passage for me. I still have far more boxes to unpack than I care to disclose. I am currently flue free...thank the heavens! and I'm thrilled and humbled to be contributing to the new Get Messy as a creative team member.

Oh Yes! You read me right. I am on my very first creative team. More than 20 years after playing in my first art journal which was really just a spiral notebook, I am now excited to be sharing my actual work. Art journaling is not just a form of messy scrapbooking, although it certainly could be if that's your thing. Art journaling is expression, it's no rules, it's experimental, it's liberating, it can be sparse or full of color, layers and texture, it's intense, it's celebratory, it's cathartic whether you speak through words or images...through layers of paint or ripped pages from books. It is poetry laid flat and covered in gesso. I don't use it to preserve my memories...I use it to process them, to explore my present and daydream about my future. It is everchanging...just like me.

If you find the idea of art journaling fascinating, you are right. It is. If you are interested in being part of a community...then the Get Messy Group might be for you. I am happy to have found it. I am happy to be sharing, and I hope that we can be friends...that we can inspire each other, and we can both...in our own little corners of the world, create, share and get messy.

6.26.2014

Digi Delight

One of the shop relaunch questions I've been receiving is whether or not there will be printables available for sale and the answer is yes sireeeeee! I love digital and I can't imagine not offering them...I will be doing something a little different though...

In addition to a fun new label set:


 and the long awaited milkcaps:


I am also going to do a monthly embellishment/label set based on trends + colors I love.  No 3x4 or 4x6 cards and no limited timeframe. You can get them when you want them.

I'm also working on some really cute cut frame files

These are coming very very soon:)

6.21.2014

sneaks

I haven't been shouting it from the rooftops or anything, but I have briefly mentioned here and there that I'm prepping the shop for a relaunch. Without getting too deep...at least not in this post, I thought I'd make a tiny visual introduction...


One of my main priorities this go round was to keep it simple and functional. Not just on the back end, but the product as well. That started by doing what I love best...designing paper based items.


As much as I love rubberstamping...there was no way I could leave them out. I will be releasing a small limited edition collection of wood handle stamps derived directly from my own hand lettering. When I refer to handlettering, I don't mean handwriting...the designs I created for this small set of stamps represent many many hours of pencil on paper work and I'm pretty excited to not only be releasing them in the shop but paying homage to how I got started in graphic design many years ago.


If you visited my Etsy shop back in the day, you know that one of my most popular items was the custom minibooks affectionately titled "project minibook." The shop will include a stripped down version of the project mini, but the name remains the same.

Next week I will share more details about the products and the shop.

5.03.2014

a walk down memorykeeping lane

Happy National Scrapbooking Day! Yes, it's a thing.

I thought that it would be fun to share some of my early scrapbook layouts and kinda see how much...or how little I've evolved:)


This may very well have been my 2nd or 3rd layout ever. 8.5x11 because that was my jam and still is sometimes and lots of distress inking and stamping. I made those flowers free hand so yeah, the making of my own embellishments started from the very beginning. Just to give you a frame of reference, my niece was about two in that picture and she just turned 18 four days ago. EEK!


Another Allie layout because early on I thought scrapbooking was all about kids and since I didn't have any I used the one and only child to whom I had somewhat unlimited access. 2005 and I was super into layering and patterns. Oh, and tearing paper...i don't know what I was thinking other than
TRY EVERYTHING!!!!


Still on the "scrap my sister's kid" train. I decided to try 12x12 and it felt like a lot of real estate to fill up. I also realized that I'm a one maybe two photos kinda gal and always have been. More layering, more handmade embellishments. I still love this picture and remember that day fondly.


Yup, I was way more prolific in my early scrapbooking years. This was pretty simple and I think it was a scraplift...so if it looks like something you made back in the day, thanks for the inspo:) To those that think using embroidery floss on scrapbook pages is new, it's not. I'm glad that it made its way back around again but I'm no longer really into it.


Yay! Seven years later my sister gives birth to another child just so I'd have someone other than Allie to scrapbook. Okay...that might not have been the whole reason. Clearly my style evolved very little. One picture, layers, buttons and handwritten journaling along the side. I have about 50 more that look just like this one.


A rare two picture layout, but it follows my basic formula. It was around this time that I started machine stitching on everything. My nephew was about two or three in this picture and he is now 11. Love that I was still using buttons and cut out embellishments.

Around 2006  I stopped scrapbooking my niece and nephew. I wanted to scrapbook my family as an extension of my own life and not as the primary subject matter. I also cancelled all of my scrapbooking magazine subscriptions since they never really got behind depicting layouts that looked like my life. I switched to the Internet where I discovered the Dares and other styles of scrapbooking that more closely fit my aesthetic.


Cut to 2010 and I was still keeping pictures to a minimum...still layering and still machine stitching. The big addition was mist. Let me tell you...it was short lived. I still like mist, but I don't do it very much.


Almost 20 years later and I'm still participating in this amazing hobby. It has helped my unwind, it has helped me become far more observant, it has helped me remember things I had long forgotten...but really it's made me happy and grateful for my life. I think all these layouts pretty much look alike...except for that first one which was kind of an anomaly. I still like all of the same things. My favorite embellishments are still the ones I make myself. I still use some of the exact same paper punches and supplies. I now scrapbook 6x8 layouts which is really a slightly smaller version of 8.5x11 and these days it's almost all about me:)

Here's to another 20 years.  Oh...and note to self...use my own handwriting more.

4.28.2014

Fast & Loose

This is pretty much my card making style.

I love to make them. I love stamping and paper and embellishments and sewing...I just like them better when they take me less than 10 minutes.

Two minute cards? okay, I'll cop to a bit of hyperbole there...but you know what I mean.

In an effort to get these cards to come together quickly I always start with a bit of inspiration. I like looking for non card related images in particular. I try to avoid using other card designs as inspiration since I find myself wanting to recreate them rather than be inspired by them.


For today's card I was super inspired by the cover of this simple modern planner. Sad that it's no longer available, but it's really pretty and was easy to interpret.

Wanna see how I did it? Check this out...


Supplies:

Hero Arts Classic Messages 2x3
Acrylic Block by Tim Holtz
Jenni Bowlin  Spice Tin Ink (i think this was discontinued)
Sundrifter 6x6 Paper Pad by Studio Calico
Puffy Stars and Circles Stickers by Twine & Ink (got these in the "Gertrude" add-on from SC)
Labels by me

Sorry some of these items aren't readily available.  I tend to try and get as much use out of my supplies as I can. One of the reasons I love this design is that I can use such a wide range of products...sequins, enamel dots, punched paper shapes, even small stamped images. I think I'm ready to make another two minute card:)

4.18.2014

MAKE IT | DIY POSTCARDS


As we slowly approach the season of road trips and vacations I find myself sifting through my collection of postcards. I don't keep very much mail, but for some reason I always hang on to them...attaching them to my fridge or my bulletin board. Quite honestly, I almost prefer a postcard to a greeting card...I don't know why, maybe I just love imagining myself in the picture...just slightly out of frame or the idea of someone stumbling on my pack of old postcards one day. Yes, I'm a bit of a romantic and to me...postcards can be pretty wonderful.

I decided to make of few...just a pack of pretty pictures that I could give as a gift or keep for myself. The box is all important because it inspires the recipient to perhaps start a collection of their own.

Here's how I did it:


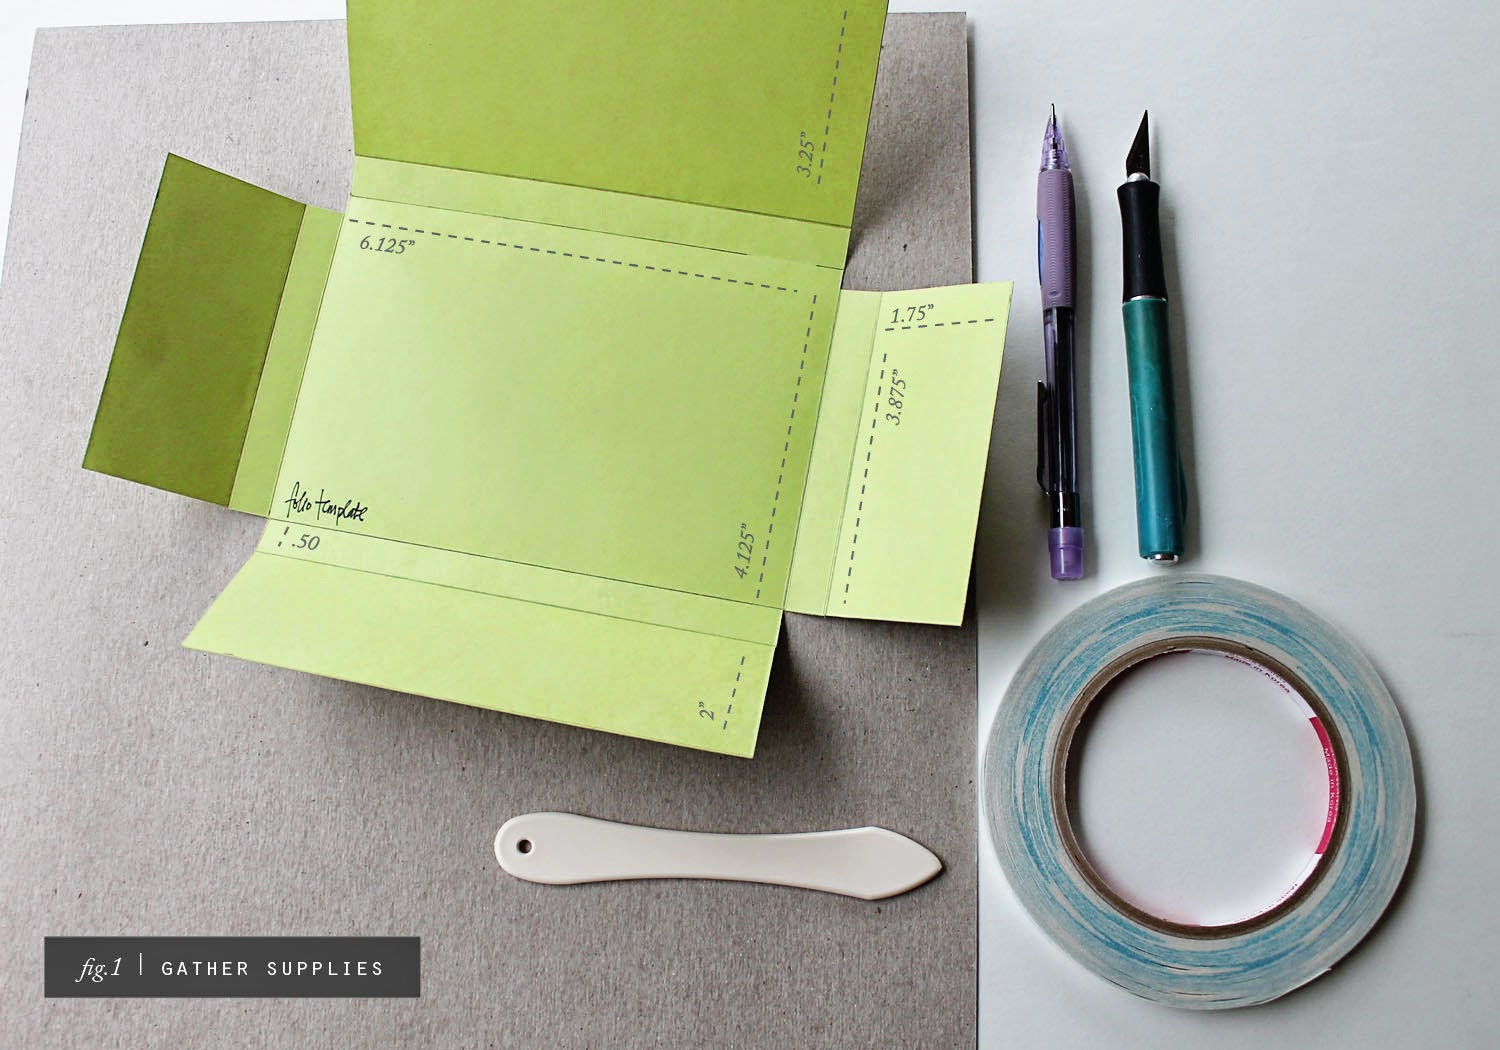
fig.1 I gathered my supplies for the box first.  This included a 12x12 piece of chipboard that came in a shipment I received. A template I made, some strong adhesive, a pencil, a craft knife with a fresh blade and a bone folder.


fig.2 Trace the template on the chipboard, cut and score. Use the picture and measurements as a guide. Round corners if you like and add tape. The box is designed to accommodate standard 4x6 cards.


fig.3 Choose the pictures you'd like to use. Include a good assortment that will work well for a variety of occasions. Don't be afraid to try fun filters...they work well for this kind of project. I prefer Kodak photo paper with the satin finish. Add double sided adhesive to the reverse side of the photograph.


fig.4 Adhere photos to the postcard backing that you can download here. Trim the edges if they don't match up exactly. This process is called duplexing. I use a crisp white card stock for the postcard side. 


 fig.5 Use a piece of black cord or elastic to keep your box closed. You can also use a small Velcro dot. If you're giving as a gift, be sure to include a set of postcard postage and even a cute pen. Enjoy!

4.16.2014

from break up to make up


About a year ago I decided to cancel my scrapbook kit subscription. While I liked most of the product, I felt overwhelmed by all the stuff I still had yet to use, not to mention all the boxes that I had not even opened. I also felt like choosing my own stuff might be worth the effort if it meant that I would end up with only the things I wanted.


That worked for about two months...and then I took a break from buying stuff period. At least paper crafting stuff. I think I just needed a really good purge and some time to figure out what I really wanted. My style had evolved so much. I no longer made traditional layouts and had more than enough supplies to support both my card and stamping habits...but what about my pockets?


Granted, my memorykeeping style is very simple. I place pictures in pockets with a bit of story and that's it. Would going back to a kit make sense for me? Well...this past month I did it. It's an experiment really. This time I chose a kit more in line with what I do. The Studio Calico Project Life® kit. I've been curious about it for a while. It's smaller...just enough bits and pieces to do a monthly spread and then some. Truthfully, not everything was my style. That happens sometimes with a kit. But this time I had a system. I use the elements for three main things...my pockets, minibooks and layouts. I separate out what I know will work for each one and put a rubber band around them.  Everything I know I will absolutely not use I place in a flat rate postal box. When it's full it's gone...I'll either sell it on my blog for a small cost, give it away, or drop it off at my local Goodwill.


If you're thinking about subscribing to a papercrafting kit...specifically a memorykeeping kit here's some things I've learned...

♥ Choose a kit that fits your hobby. If you don't make cards a card kit might not make much sense in the long run.

♥ Give yourself 3-6 months to just look at what's released. Look at projects made with those releases. If you can see yourself using a large percentage of the materials it might be a good idea.

♥ Make sure that the designs align with your personal aesthetic and challenge yourself to use items within a 30 day period.

♥ This may not matter to you but if the company has a design team that makes projects you like it can make a big difference. Sometimes all I need to get going is just a bit of inspiration.

♥ If you hoard more than you make, a kit may not be a good idea. If you have more than 1 or 2 boxes that sit untouched....don't be afraid to put the breaks on your subscription. You can always pick it up in the future.

♥ If you find the product or community not to your liking. Just. Stop. Subscribing. Use the product list as a jumping off point and curate your own kit.

♥ If you receive a kit you don't like, challenge yourself to use it in a different way...home decor, a minibook, recipe cards, make a notepad and stick it in your purse, love notes for your family or yourself, create a cute ephemera pack and send it to a friend who loves paper like you do. 

♥ You can't worry about missing out. I know that we all want everything...but that can make you crazy. After that major Target/Missoni nightmare I will never go nuts trying to buy anything online again. On reveal days...I get off the computer and I go and DO something...make dinner, knit, walk my dog, watch a movie, read. Sure, I may not get everything...but I get my kit, and that's enough:)

**this month I totally missed out on that cute 4x4 gold album. I ended up scoring it week or so later and received it way before my other stuff. Missing out gave me time to think about whether I really wanted it and come up with an actual use for it. I always manage to track down the things I must have and when I don't...there's always next month:) 

4.11.2014

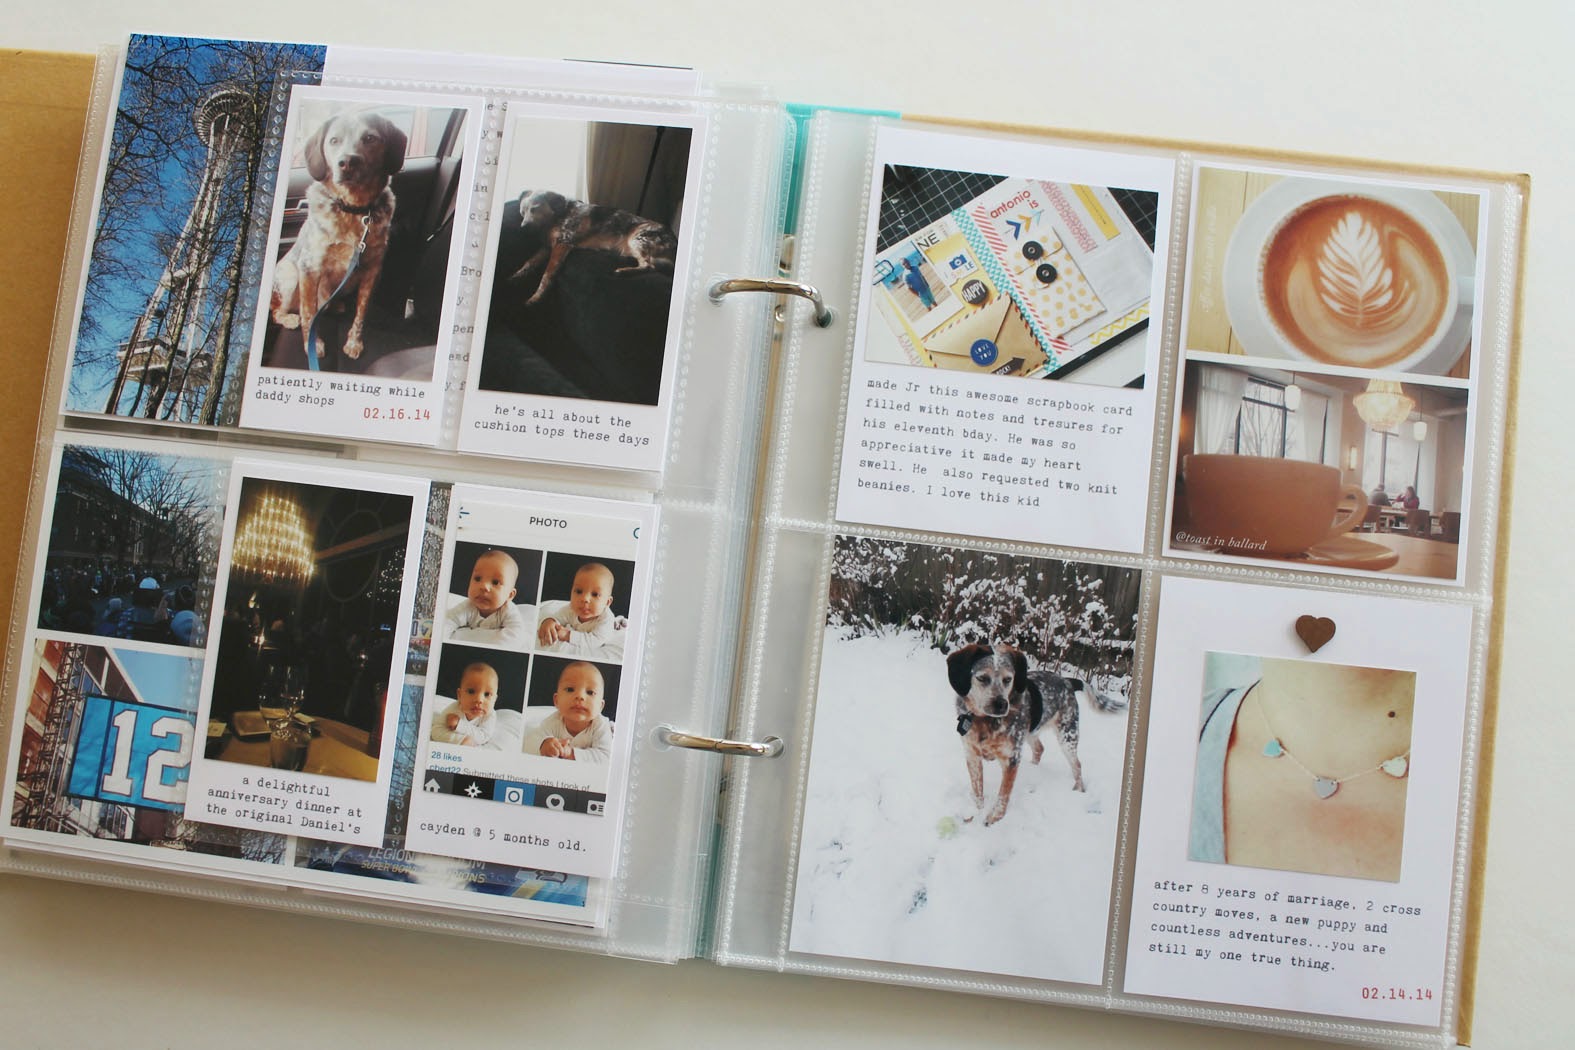
pocket memorykeeping | my process I


edited to add: a few people asked about the page protector to the left in the above photo. It is actually made for business cards and I got it at Staples. I just cut it down from 8.5x11 so it would fit in my book. I turn it to the side and punch holes. The top two pockets are open on the bottom...it may seem like the photo would slip out but that never happens since the cards on the other side keep things pretty snug. I modified my pictures so they would look like Instax photos...but they're not:)

Because I update my album monthly, I am always working a month behind. I love it...for me it means that I can relax, take pictures, and just let life happen. I use a small notebook to jot down highlights...it's not a journal or a date book, it's just for things I might forget. I don't even concern myself with the current month until it's over. Once the new month begins I begin my process... usually within the first week.

Step 1. I transfer photos from my devices to my computer. I save to an external hard drive at the same time.  Sometimes this is all I do on a given day. It helps to break things up a bit.


Step 2. Using Aperture, I clear out the pictures I don't want and I place the ones I do want into an album titled "month_year." I occasionally edit my photos in Aperture using VSCO, but this is rare. I simply prefer and am more proficient in Photoshop.  I create a new folder and export the images I want to use into that folder. I then edit using Rad Lab. I always edit a bit...it makes up for my less than stellar photography talents. I stash any ephemera I have in a MS zipper pouch.


Step 3. I draw up a little sketch of where I want things to go and then crop accordingly. Because my style is so basic, I use a handful of different designs over and over. At this point I work on adding journaling...some directly to photographs...some on journal cards in Illustrator. I know that there are people who add journaling the way I do using apps on their phone and just printing the whole thing out, but I don't.

Step 4. I print my pictures separately and then adhere them to plain white cards that I've already printed and cut. It might seem a bit inefficient to print them separately, but it's my process and it works and it allows me to utilize every inch of photopaper for pictures.


Step 5. Once I have all my photocards completed, I look them over and see if anything needs to be added. Usually I keep things basic...occasionally I'll add a label, a bit of flair or some wood veneer or washi...but more often I just slip them into the page protector and call it done.


That's it. 90% of the work takes place even before the pictures are printed out. From start to finish it takes me no more than a few days. I know this isn't the most creative process...I don't use that much stuff, but that's not what it is for me right now. I get creative with other parts of this book...but I'll leave that for part two.

.......................................................................................................................................................................

The winner of the giveaway was Rhonda Nichol.

rhonda nickol said...
Right now my go to essentials are my stamps, mist/spray paint, wood veneer,labels/tags esp. Bananfish(my favorite),tiny attacher and i recently found a liking for doilies and enamel dots. I love adding some of these items to projects, I like alot of detailing to projects. Gotta start using my stash!
April 8, 2014 at 9:22 PM

send me your mailing address and I'll get your album out pronto. france@bananafishstudio.com